Here you will find basic information about the application and its features. Also, in the application itself, next to many elements you can find the  icon. Clicking on it will give you an interactive hint.
First of all, you need to create a new Data Excavator Task and complete all settings. In addition, you can set all the default settings. Note that many settings contain a help button.
You can choose between creating a standard project and an express project. The Express Project will immediately ask you to enter .CSS selectors of the elements you want to extract from the website. In general, if you know what .CSS selectors are, there is no special difference between an express project and an ordinary project, in which case it is better to use an ordinary project.

Then, choose between creating with wizard and creating with standard modal. We recomment to use wizard for first time.

Then, pick nodes on the page. All picked nodes will be scraped by our app.

Once you have created your project, simply click the Start button on the project card.

You can also use the ready-made projects library. In this case, just find the website you are interested in and click on “Create a project”.

You can easily import and export project settings using the corresponding buttons in the settings section. You can also use the default settings as a starting point for a new project. We use the .json format to import and export data.
If you want to import settings, press “File” -> “Import project from file”

You import and export project settings from the project card. Select any project you want to operate and press on the “Settings” button. Then, use “Import” and “Export” buttons.


Go to the robot’s settings. Find the sections “What website pages should be scanned” and “What website pages should be scraped. The first section is responsible for the page downloading and analysis. The second section handles the page scraping settings.
Use substring masks to process the selected pages. For example, if you want to process all product pages, then try to understand how to distinguish these pages from other pages on the site using the URL. If product pages have strings like https://amazon.com/dp/123123, https://amazon.com/dp/231132, then obviously all product pages have a dp substring. Use this for customization.
If you want to process all pages, just use * as the “all pages” mask.

Of course, you may not use these settings. In that case the robot will try to extract information from each page it finds on the site. Sometimes this can be large amounts of data. For this reason, we still recommend targeting pages for processing.
Our application uses CSS selectors to extract data. You can read more about what they are in our article.
To target nodes, go to settings, and open a demo page from the target website. If you want to extract all products from the website, you need any product page. If you want to extract all videos from YouTube, open any video page. In other words, you need to open the typical page from which you want to extract data.
So, firstly open project settings.

Then, follow to the “Elements to scrape” tab. Complete URL of any demo page and navigate to the page.

Then, pick nodes on the page by clicking on elements.

The basic unit of the system is the project. Each project has several property groups. The main property groups are the crawler settings, grabber settings, and pattern list. Settings of the crawler affect the server that downloads the source code of pages and work with the site through http(s) protocols, downloading binary files. The grabber settings affect the server that extracts data from the downloaded pages. The list of patterns is a set of rules by which the grabber extracts the contents of pages.
Note – in the settings window there is a button “Set to defaults”, which resets all properties to a typical state.
Also, the settings window contains buttons “Import settings” and “Export settings”. These buttons upload all settings to a file or upload all settings from a file.
You can change the settings and try to test the project. There are a lot of settings, and you will have to deal with some of them, especially when it comes to complex sites. If something goes wrong, you can always reset the settings to their default values.

You can increase or decrease the scraper speed. Go to “Robot settings” and find the “Robot speed” section there. Move the slider to the speed you want. We recommend starting with Econimical mode. If the site won’t prevent you from scraping, try increasing the speed.

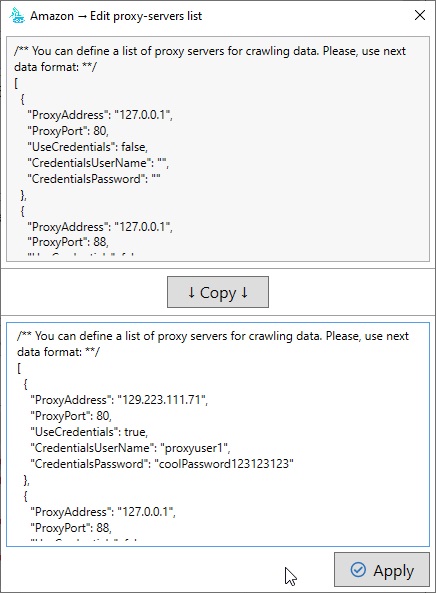
In some cases, you may need a set of proxy servers to collect data from the site correctly. Sometimes the site is not available in your location, and sometimes the site actively monitors user behavior and blocks user activity by IP address. In such situations, a proxy server can be used to perform actions on your behalf. Our application supports proxy servers both for native data scanning and for CEF scanning.
You can define several proxy servers that will be used to scan the site. In this case, a distinctive feature of our application is the ability to rotate proxy servers during the scanning process. You can choose several ways of proxy rotation – random rotation, consecutive rotation, absence of rotation.

Sometimes you may need to execute your own JS code on the pages of websites. Moreover, in most cases it is very important for quality data scraping.
For example, if you worked with amazon.com or aliexpress.com, you know that part of the necessary information (including all photos of the product) is encrypted in the source code of the pages. In order to retrieve all the information you need, you have to go to the page via JS code and process this information before scraping.
In any case, regardless of the purpose of using JS scripts, our application provides this possibility. Go to the circumvention server settings and edit the corresponding setting.

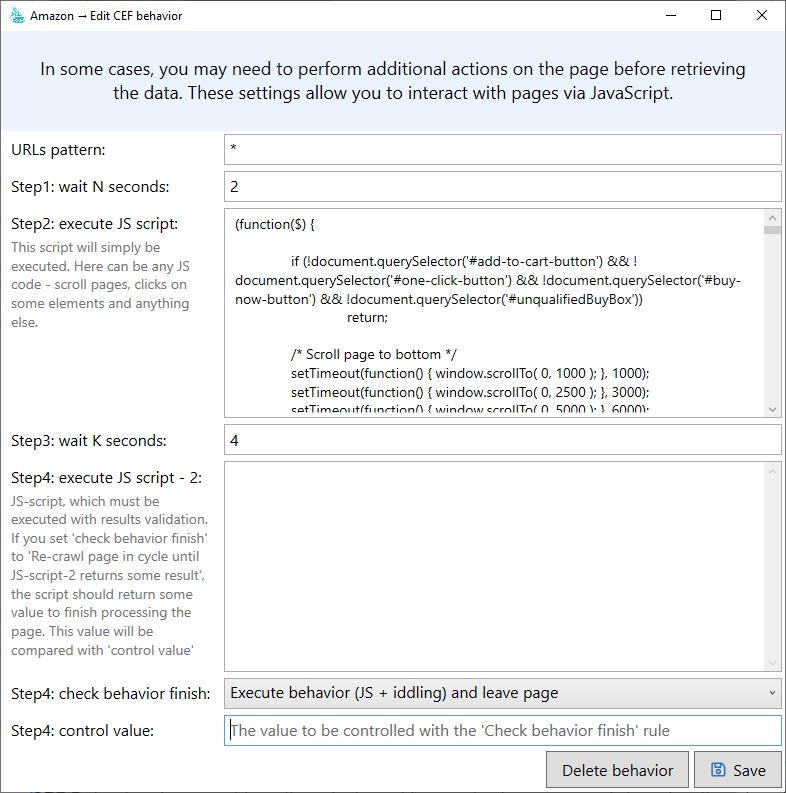
In JS handler settings you can specify the main script, and the secondary script. Our application will go through all steps sequentially (Step 1 – Step 4). If the page has a complex structure (e.g. endless scrolling), you should use “JS script 2”, and you will be able to flip through the page below and below in the loop. If you need to execute some simple preparation script (one time), use “JS-script 1”.
In some cases, you may need to log in with your username and password before you start scraping. Our application provides this option. Open the Crawler settings and use the appropriate .

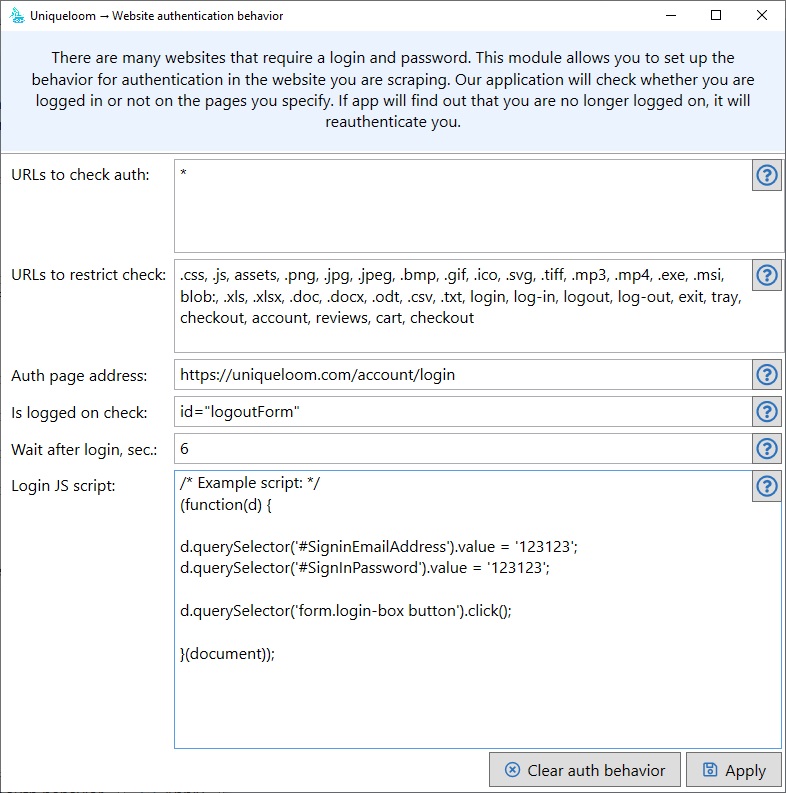
In this window you need to specify the settings for authentication. Here you can find the JS-script, which is responsible for authentication. In it, using .CSS-selectors, you can access the fields “login” and “password” and press the “login” button.
In the column “is logged on check” there is a line, the presence or absence of which will determine whether you work under your account in the system or not. If after loading the next page our application does not find this line in the source code of the page, it will try to login.
Our system allows extracting data from iframe blocks. In order to use this feature, set the appropriate setting. After that, address the iframe blocks with selectors as if they were ordinary page elements.

At the moment we have organized processing CAPTCHA in manual mode. If the site you are working with uses this technology – then you can configure our application to process CAPTCHA manually every time it appears. When a CAPTCHA appears, the program will show you a solution window. After solving it, click OK and the program will continue to retrieve data from the site. CAPTCHA configuration can be done in the project settings – and further – in the crawling server settings.

If you bought our license key on the tariff “Standard” or “Enterprice”, write in the feedback form – we will make you the settings for the site.
If you are using a key demo or promotional version of the key – unfortunately, we will not be able to make settings on a free basis. If you want to make settings on a paid basis – please contact us and we will offer you some price for these services.
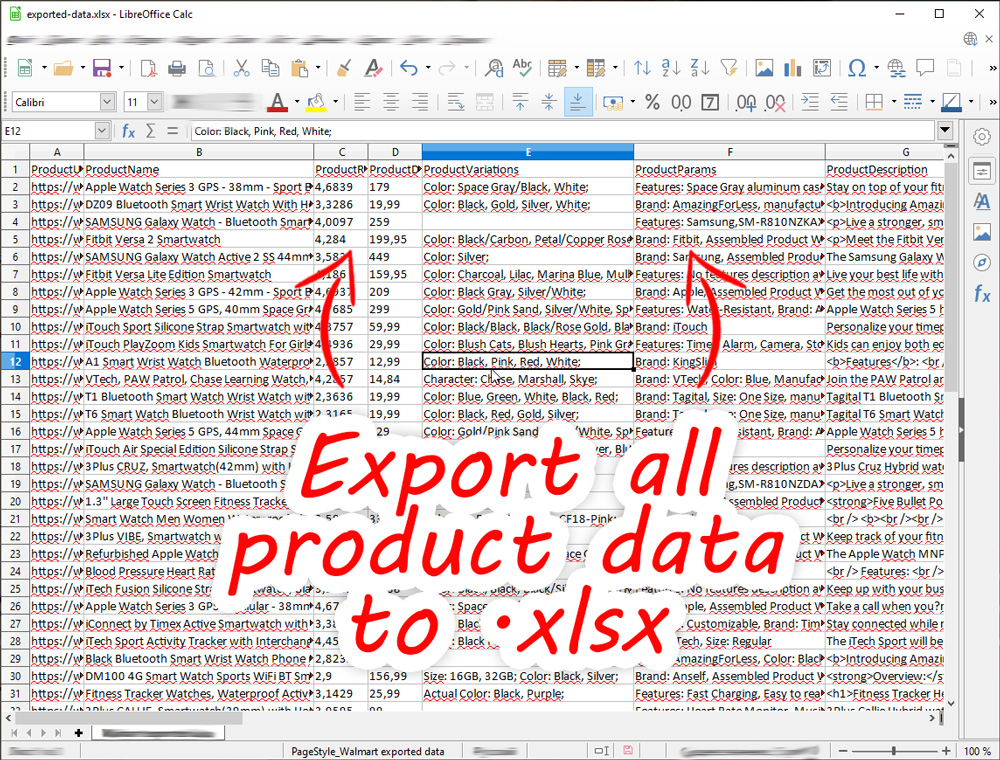
You can export the collected data in different formats. There are several formats to choose from – .xlsx, .csv, .sql, .json. The most convenient and complete is the .json format – it is close in its structure to the internal file format, and allows you to present the information in the simplest form.
When exporting data, you get a file (or set of files) with text data, as well as a folder with binary data, which can include images, archives and other data, filled with collected data and configured in the system for downloading and analysis.
To export data, use the corresponding menu item in the project block.

After that, select the necessary data to export and click “Export checked results”.
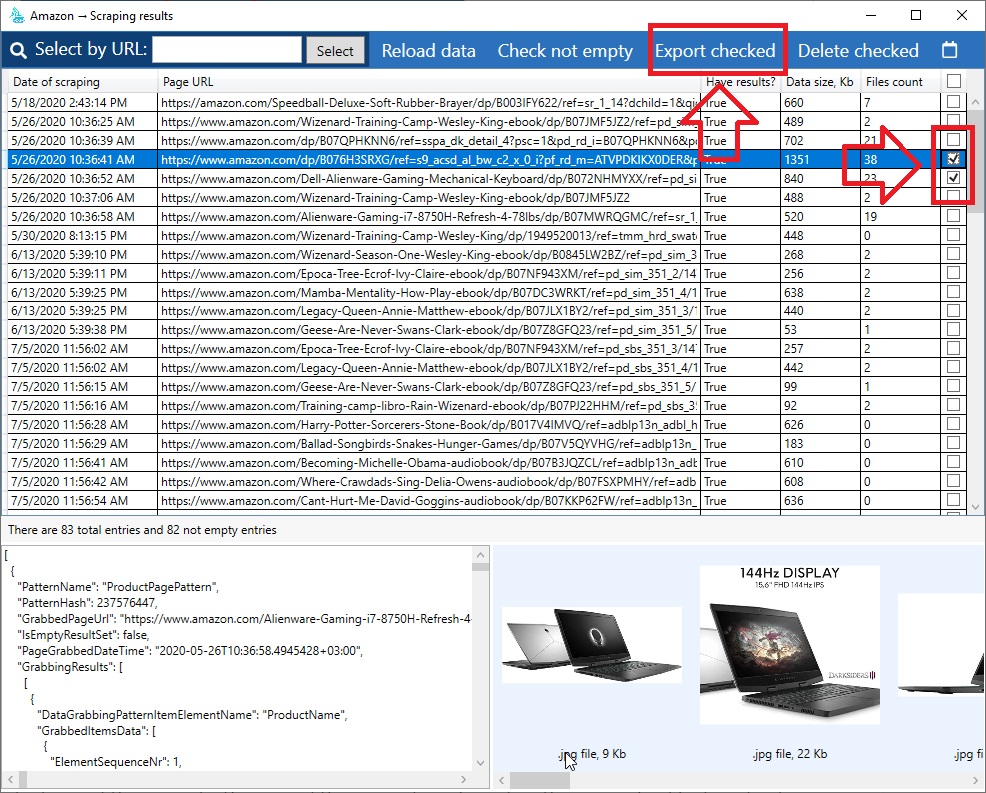
After exporting, you will receive a data file and an image folder. We offer several file formats to choose from – .json / .csv / .xlsx / .mysql. The most detailed format is JSON – it contains all data in the most detailed form.
You can export data online using http or https protocol. The corresponding export settings are available in Grubber’s settings. The function of exporting data and Http(s)-requests is implemented in the Grabbing server

The data will be sent through a $_POST array. The information itself will be represented as JSON array. Pictures will be presented as base64-strings.